
This was my first year making costumes for Halloween and the first time wearing one since I was a kid.
I took on more than I thought I could chew. Here’s how it went…
The Idea Concept
The decision of which costume to wear began with my partner asking her daughter what she would like to wear for Halloween. I think the intention was for her to pick a typical spooky outfit: a ghost, maybe a zombie, perhaps a skeleton or Dracula. This is where I made my first mistake. I suggested, ‘Why don’t we make our own costumes this year?’ This went down really well.
To cut a long story short, it was decided that my partner would be the Queen of Hearts from the Disney Alice in Wonderland animation, I would be the croquet mallet flamingo and rounding of the trifecta the young one would be the pink hedgehog croquet ball. A nicely themed set of costumes.
My second mistake came when my partner, who said she would buy one, gave me an escape route from making the Queen of Hearts costume. I doubled down and said, ‘No. If we are making some costumes, we need to make them all!’ This opened the response, ‘But do you know how?’
Having never created any clothing or costume, I didn’t know how. I don’t think I’ve even stitched a hole together. But I was determined.
Flamingo Croquet Mallet Begins
After realising I had less than a month to start work on all three costumes (I started on 5th October) I began on my flamingo costume.
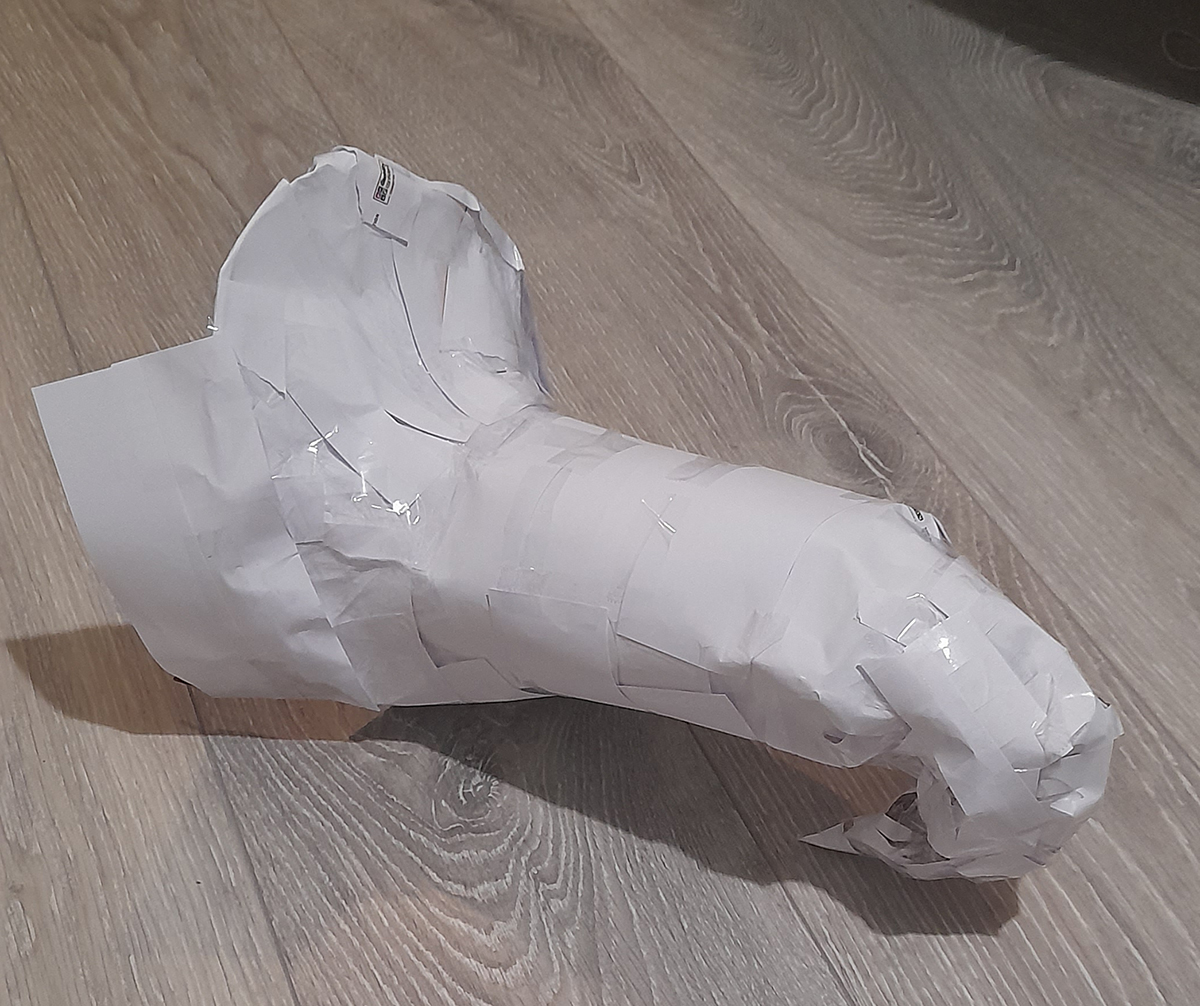
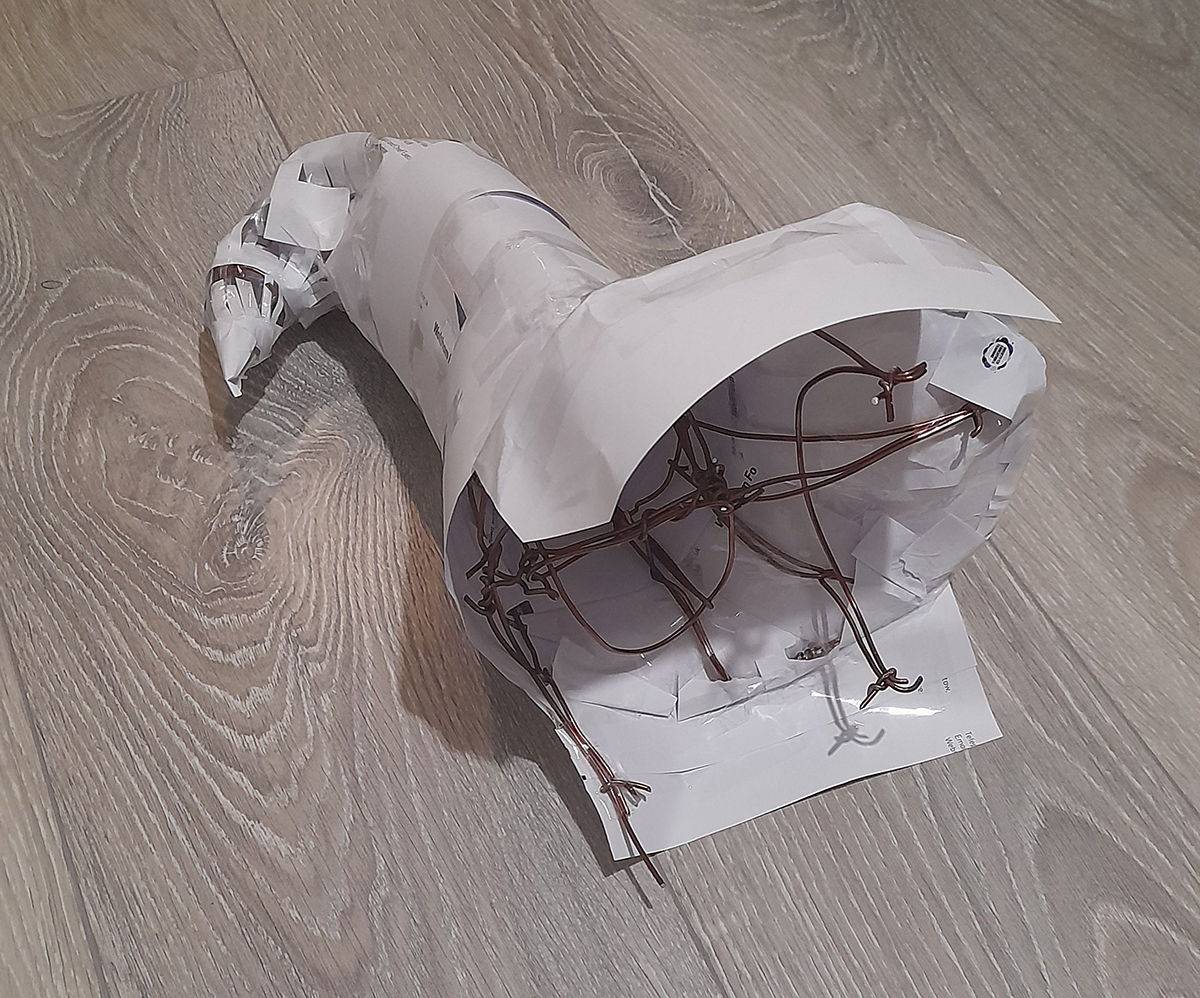
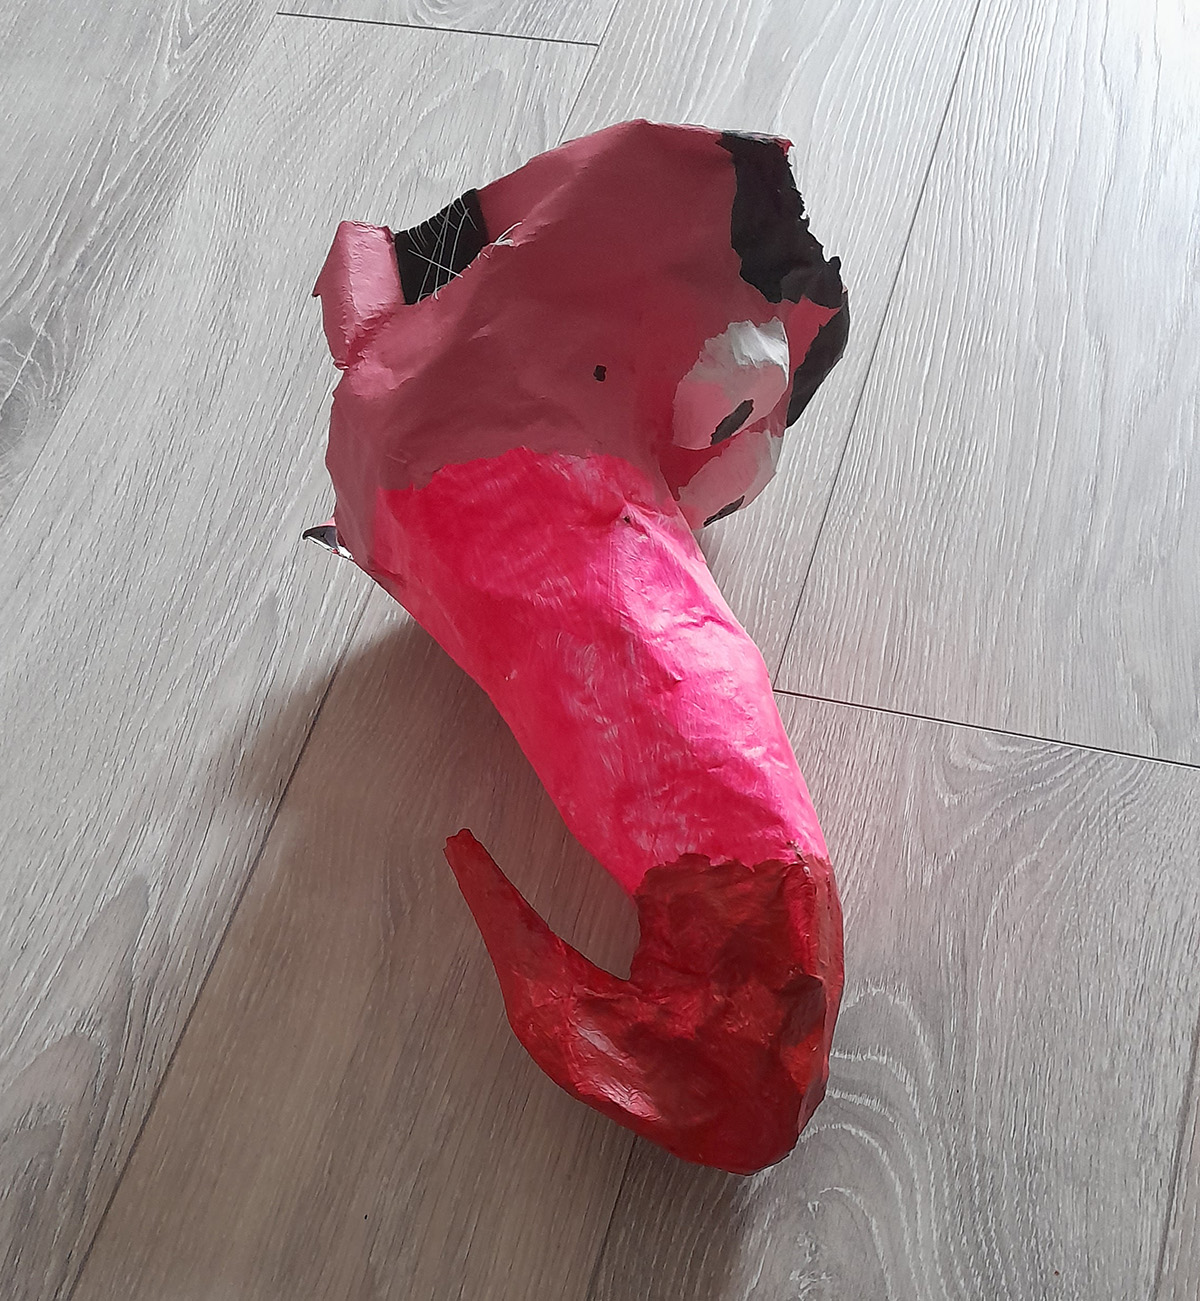
I used the wire I had previously bought for clay model making to create a frame of the flamingo head and beak. Starting with a flat plane I created circles of wire and gradually attached them around to create the 3D shape. I was honestly very pleased and surprised with the end result of the wire mesh.


Once I was satisfied with the wire I taped scrap paper around the entire frame to give a base for the papier mache. The papier mache was done over three evenings for three layers. Once fully dried it worked well and created a very solid flamingo head!

Starting the Queen of Hearts Dress
After starting the flamingo I had to think about materials for the dress. I knew the style I needed to do but I wasn’t sure about the materials required. I watched a quick video on how to make a hoop dress to find out the materials and placed an order.
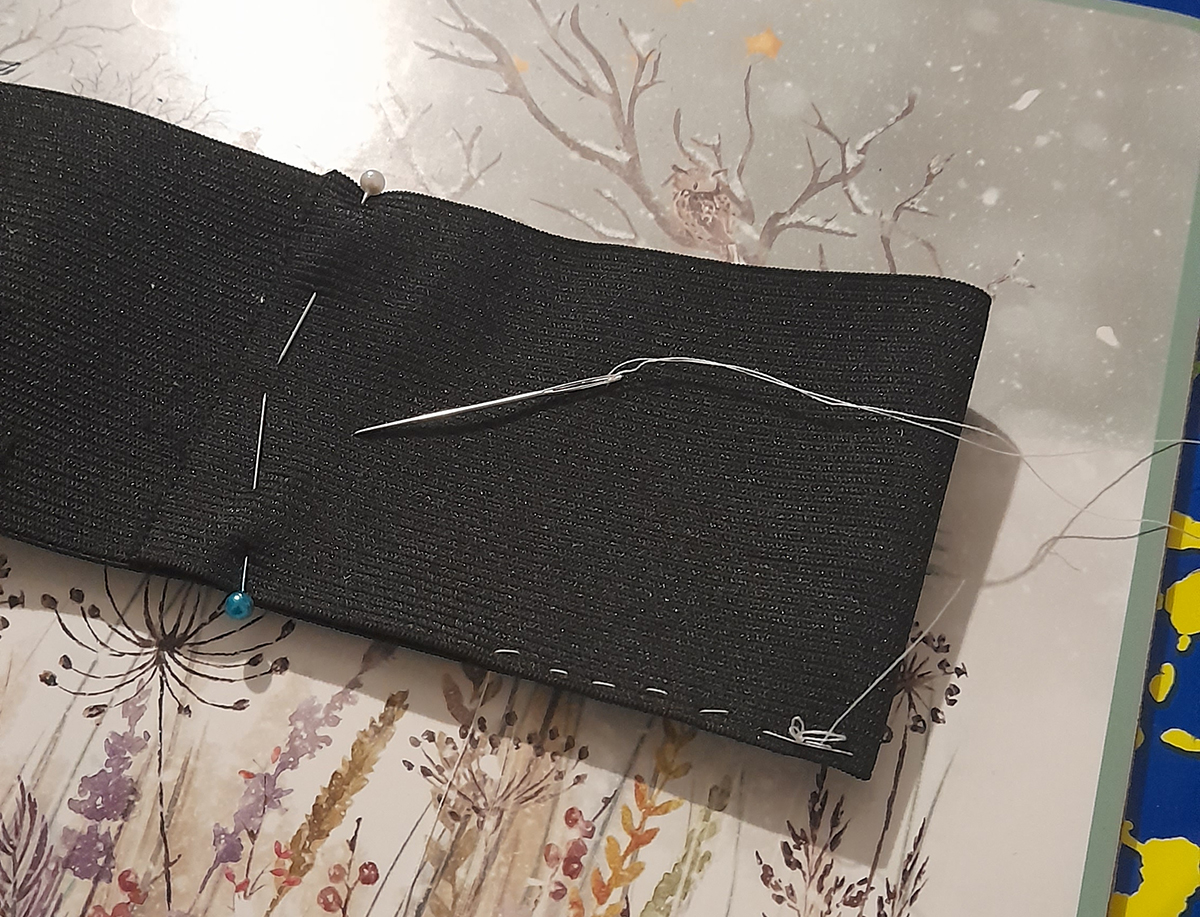
By this point I had about three weeks left before Halloween and was starting to get concerned about the task I had given myself. The first materials that arrived were elastic for the waistband, needle, threads and some pins. So I started to create the waistband making it sturdy enough to hold the weight of the material.
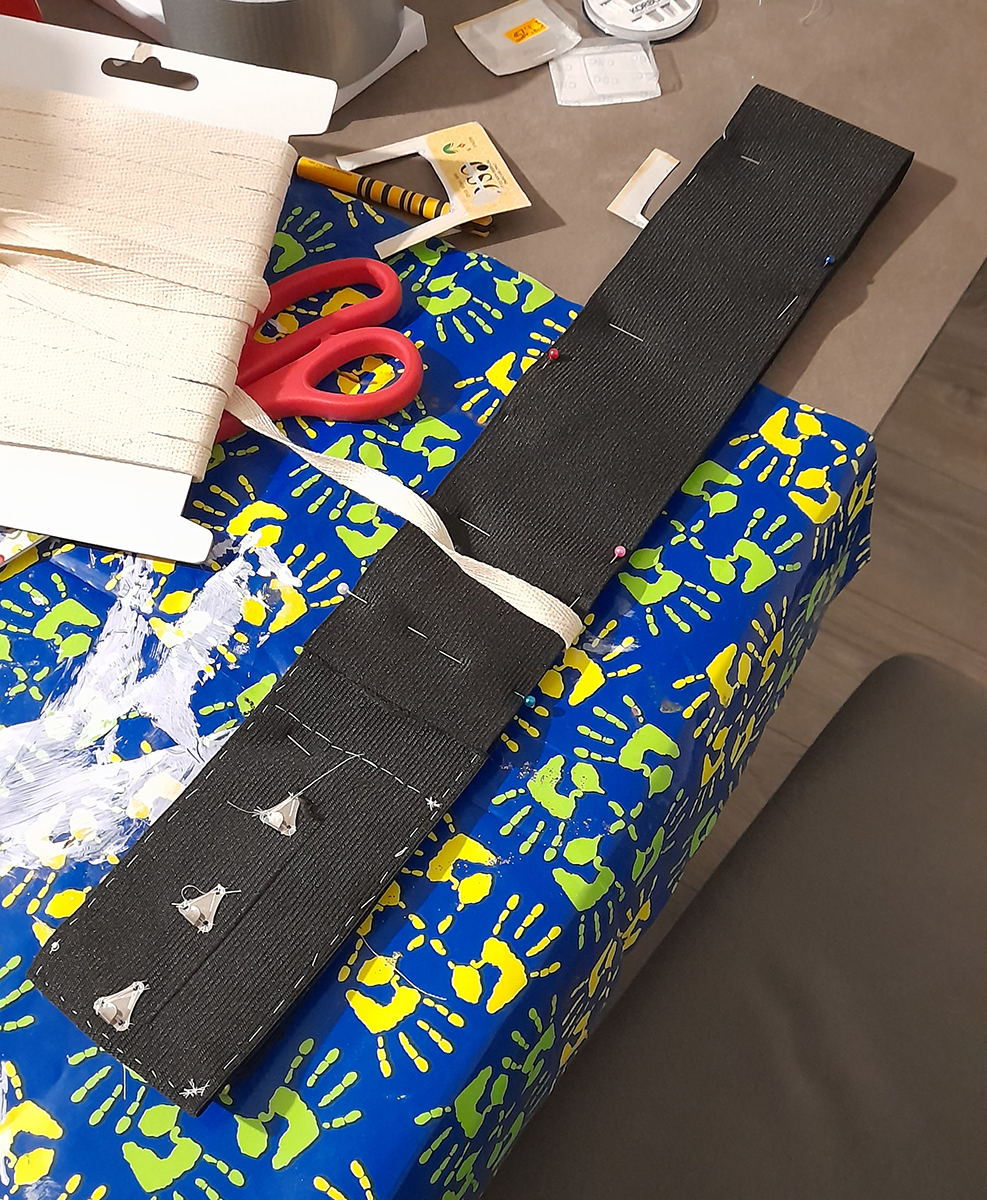
Then, when everything else arrived, I started to work on the hoops for the dress. I used plastic-coated steel boning for thee hoops and connected them together and then to the waist band with twill.

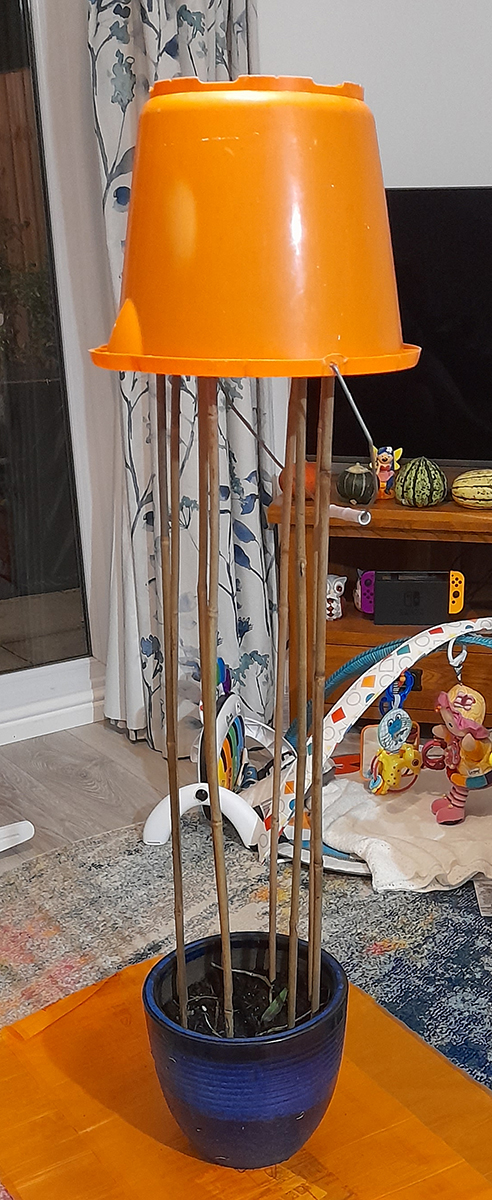
Improvised Mannequin
I’m not really equipped for dressmaking, as such, I don’t have a mannequin to work from. So I had to improvise! See the monstrosity below:
Cutting and Stitching the Fabric
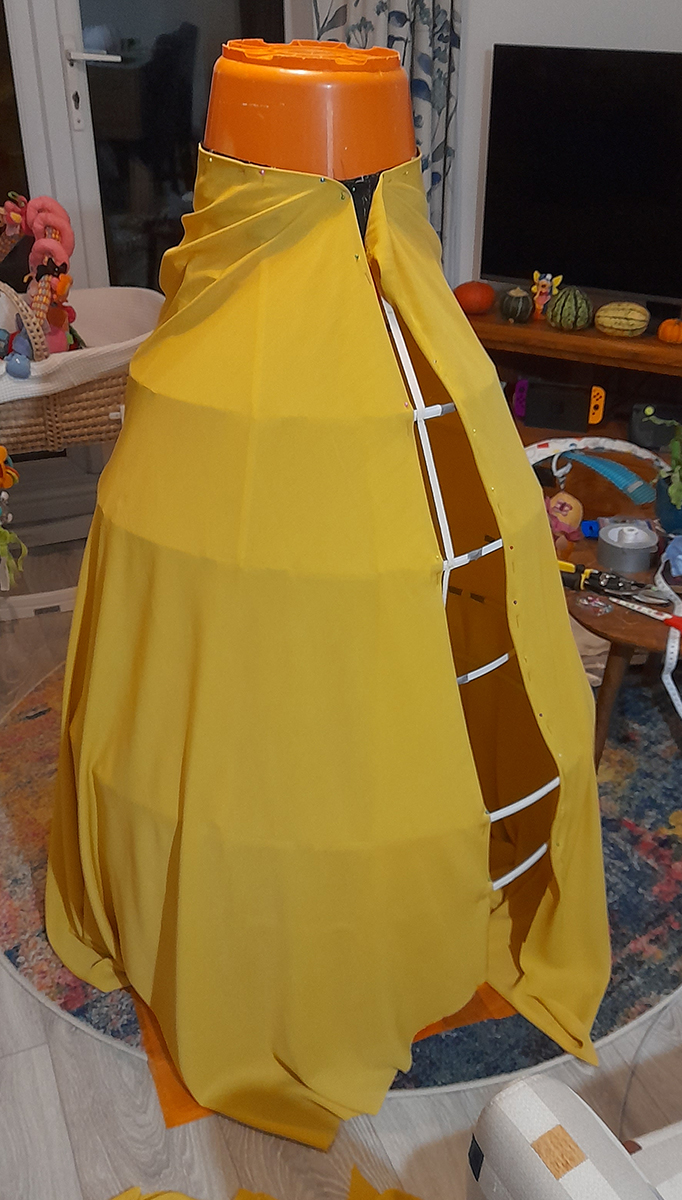
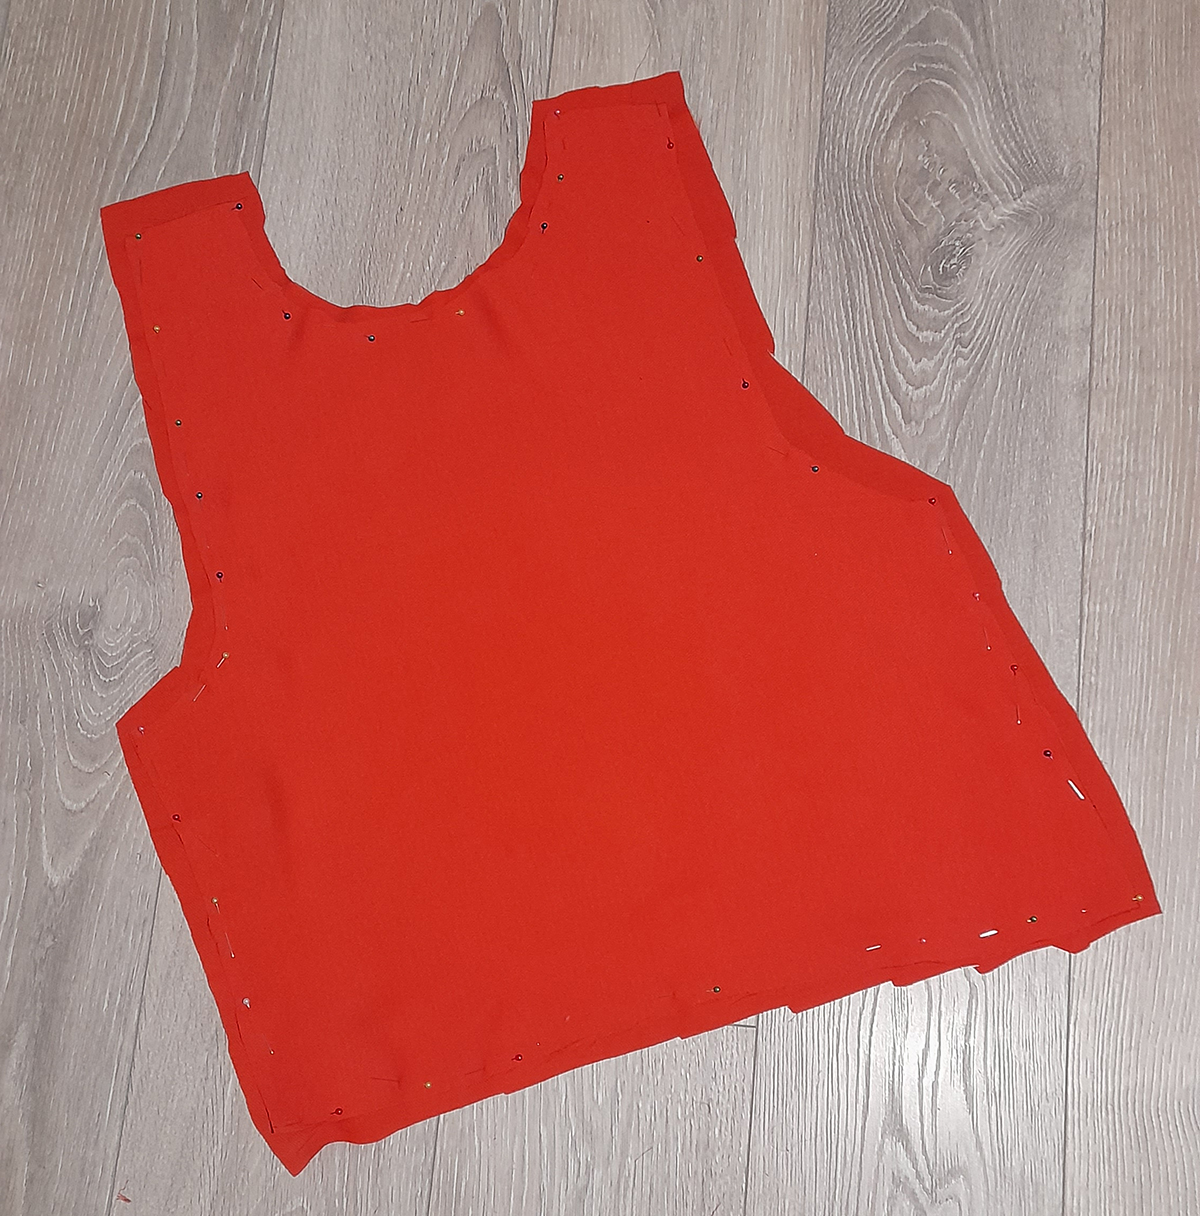
Now the frame of the dress could hang around the bucket, bamboo stick and plant pot mannequin, I was able to start cutting out the fabric and hanging it with pins around the dress.
This was a tricky process and I had some extra hands to help. I learned a lot from this process and fully realised the need to create patterns to accurately cut the fabric to shape. However, for the purpose of this costume, I didn’t have the time nor the knowledge of how to create patterns for accurate cutting.
Once cut, it was time for the stitching. I was doing it old school by hand. I have to say, it is incredibly difficult to stitch neatly – anyone who can do hand stitching neatly and at a decent pace is incredibly skilled.
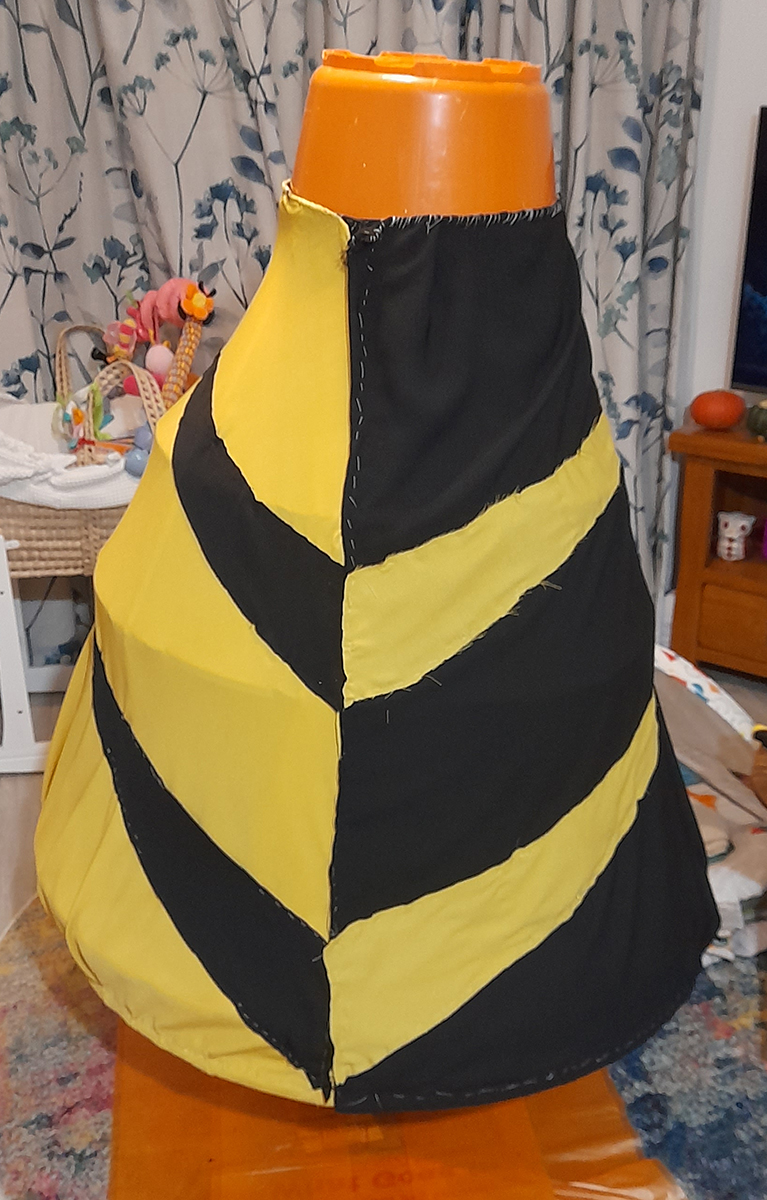
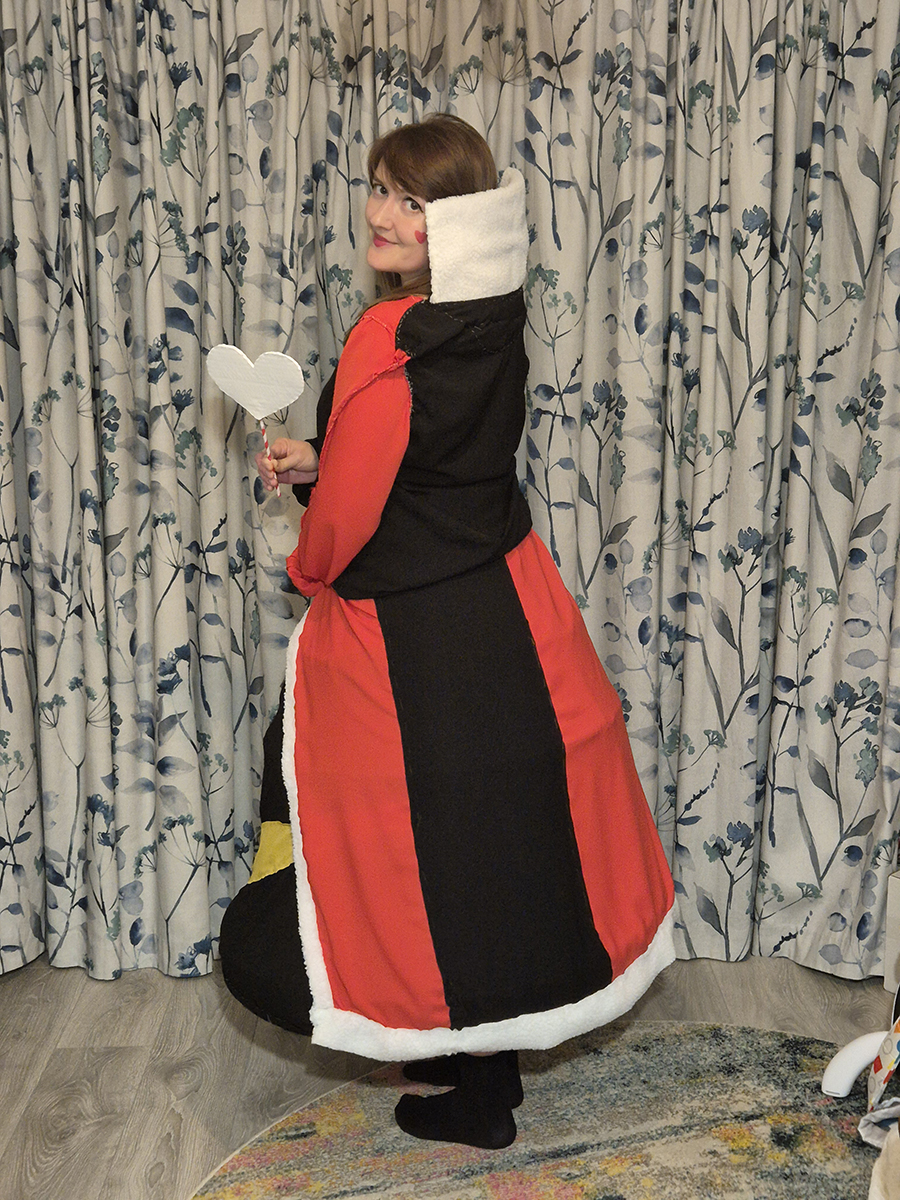
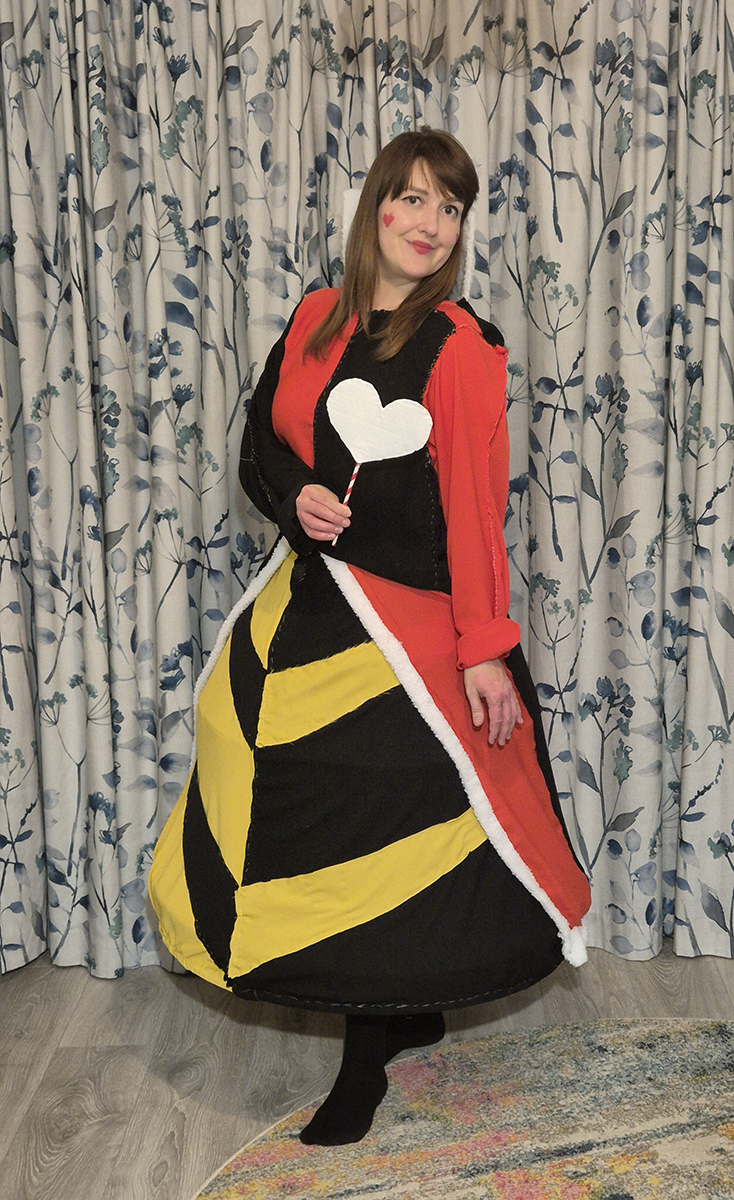
Layering Fabric and Adding Trim
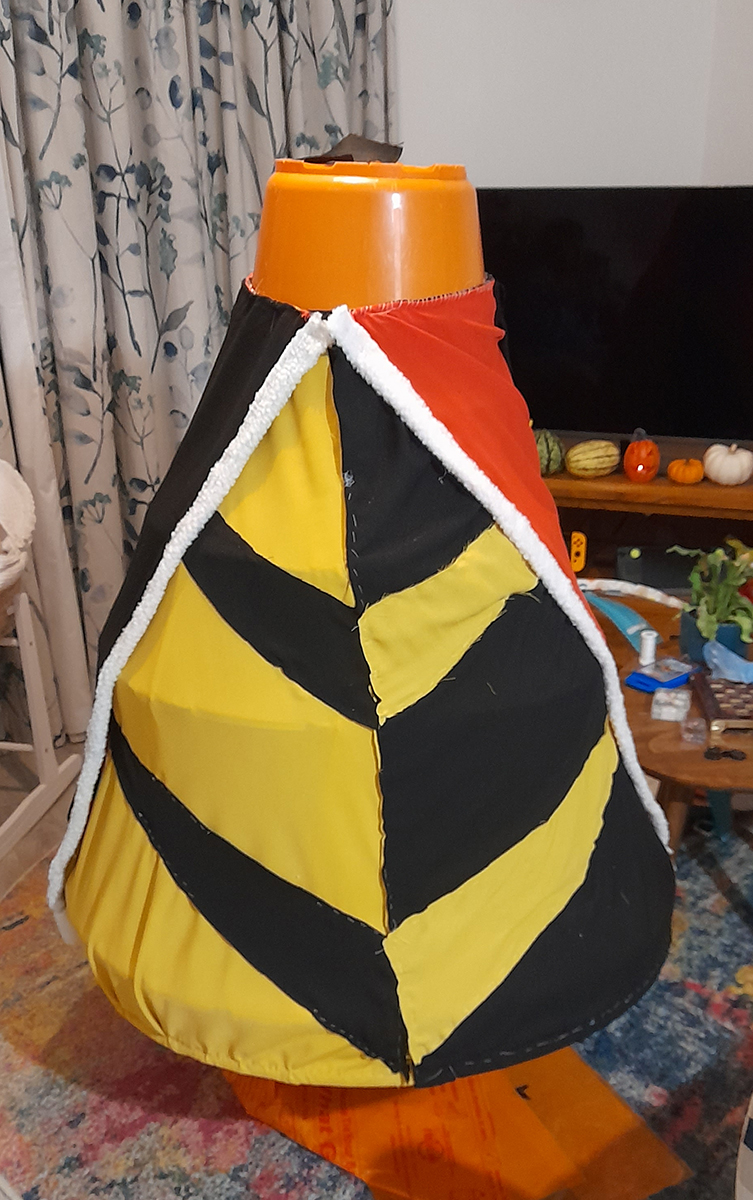
The next step was to add the second colour to half of the dress. After that, I added the alternating stripes and then the cape. The cape was meant to be loose but I accidentally stitched it to the rest of the dress – lesson learned there!
To finish the cape I added a white fur trim around the edges. This is where the dress really started to take shape and look presentable.

Continuing the Flamingo and Starting the Hedgehog
Now I only had around a week to go before Halloween. I still needed to finish the dress, but the flamingo and hedgehog also needed to be completed.
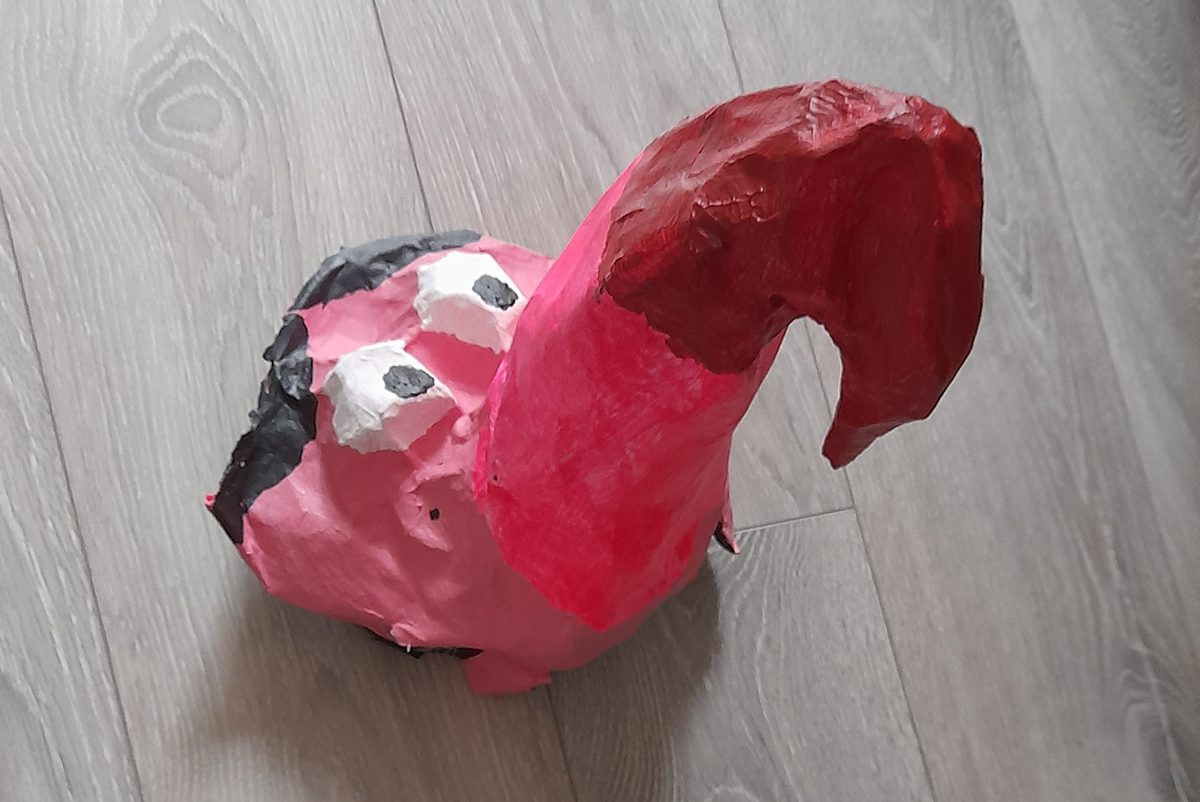
The first step was to paint the papier mache flamingo head with a base coat of white paint. Then we started the hedgehog by covering a piece of cardboard with papier mache, painting it a base coat of white, then pink and then building glittery paper party hats for the spikes.

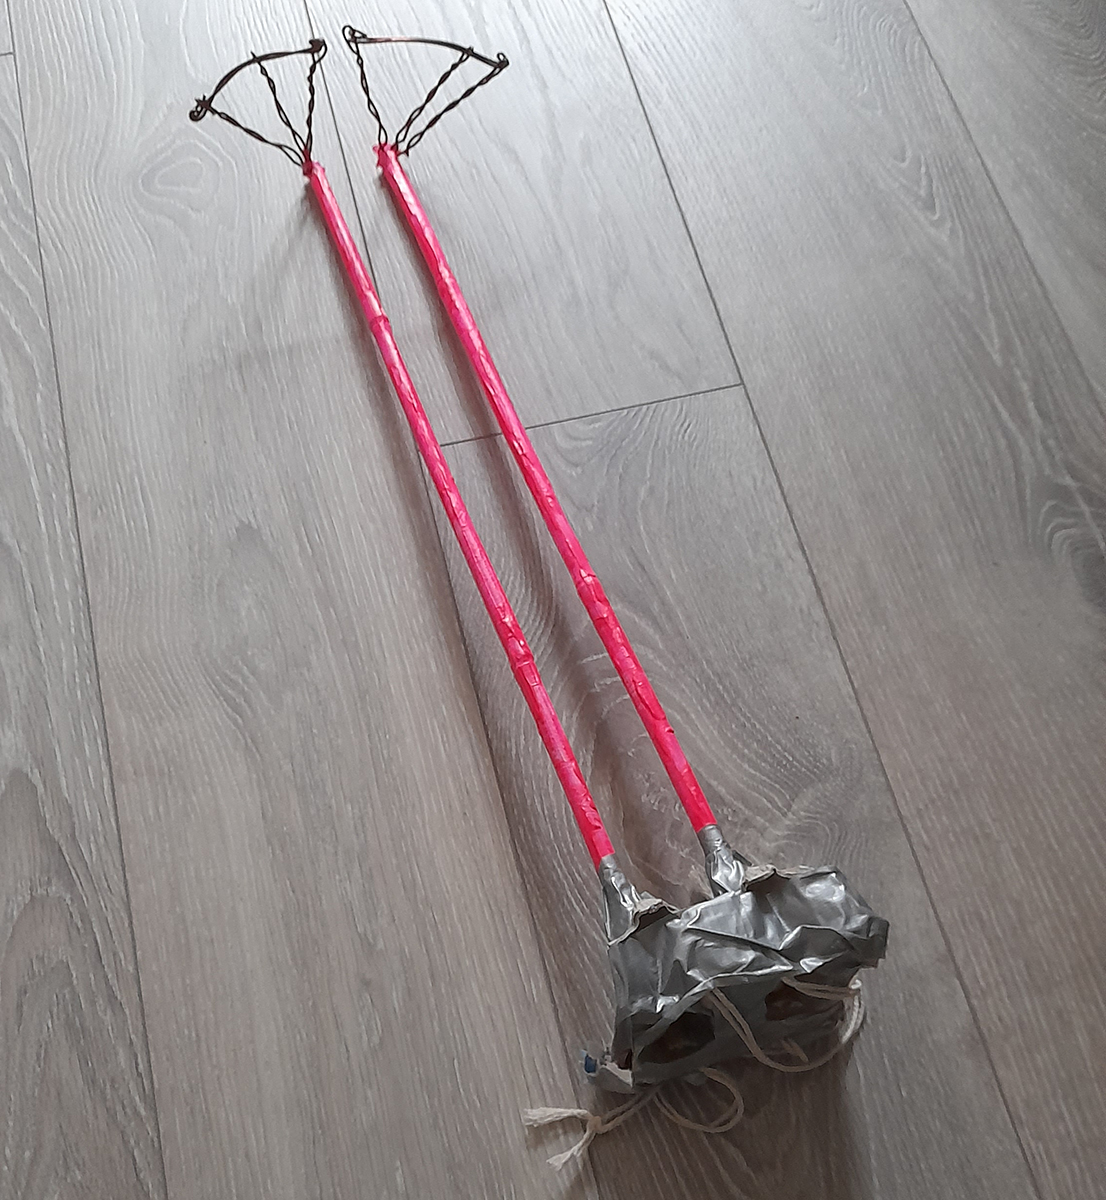
The flamingo wasn’t just a head. I also needed to create the legs which would attach to my shoulder. Bamboo sticks were the perfect material for this as they were thin and the notches on it looked like flamingo knees. I put them upright in another plant pot (a theme is developing) and painted them pink. Finally, I added wire to the ends shaped like feet and attached the other end to an egg carton with some string that would wrap around my shoulder.
Then the straps for both the hedgehog and the flamingo head were attached using the same elastic as I had used on the waistband.
Finishing the Dress
The bottom of the dress was complete. Probably the longest part of the whole process. However, I now had to finalise the top part which required me to create a shirt with sleeves. This went very well, but it was only afterwards that I realised I should have turned the shirt inside out after stitching. This would have hidden my stitches and made a far neater finish. To be honest, I was just happy to complete the costume to what I consider a high standard considering it was my first time.


The Final Costumes
This was an ambitious task but one that turned into a success! I think we might pick another theme for next year except, this time, I might aim to have them ready for Comic Con!


Leave a comment